Replica Training: Bring Your Outdoor Project Inside
Replica training is fun. This is a description of the process that will help you prepare for this season's outdoor project.
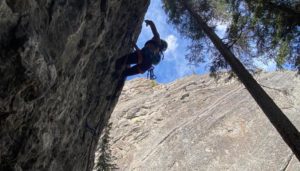
 Photo by: Noah Walker of Pia Graham
While training for an outdoor project can feel intimidating, taking the proper steps to ensure the best possible outcome makes a difference. Between climbing conditions and skin management, there are many subtle changes that can make improvements; however, a specialized training plan is impossible to replace.
With that said, a strict schedule can feel exhausting. A large number of exercises make it difficult to build motivation. Eventually, even small things become difficult to complete. Is there a more fun way to train?
Replicas make for the most entertaining regimen. It is an approach that builds project-specific finger-strength and fitness. A replica will never exactly reproduce the project, but it is a fun way to improve a person’s ability on project-like moves.
As one might expect, the best replica is that which closely resembles the project. This is best exemplified by the flat faces detailing your gym. While flat panels define the modern climbing facility, it is likely that the walls in your gym are not measured to your project’s specifications. Outdoor climbs frequently have a range of angles that are more specific than the regularly angled walls of the climbing gym.
Longer boulder problems or sport routes will often have numerous angles over the length of the climb. In these circumstances, it is best to pick out the most difficult sections, or cruxes, and to match those cruxes to the walls in your gym.
The hard part becomes replicating the movement. Very few climbers are allowed to reset the walls for their projects. This forces the climber to build their replica out of the spray wall’s variety of grips.
Whether this is a MoonBoard, Systems Board, or Kilter Board, even the most three dimensional of climbs can reproduce their movement on a two-dimensional surface. It is for training like this that the highly-adjustable Kilter Board makes so much sense. While climbing out of an overhang and onto a bulge is difficult to replicate with a non-adjustable board, it is easily reproduced by a wall that tilts at a climber’s discretion. Simply make two boulders at the two angles of your climb.
With that said, adjustable boards are rare and do not offer the fully three-dimensional experience that is projecting outside. In this respect, replicas takes a bit of ingenuity. Here are some things to consider.
Angle
As mentioned before, the perfect replica will match your project’s angle exactly. If this is not possible, try picking an angle slightly steeper than your project. This will require you to engage more and is the natural progression of replica building anyway. This might mean using larger holds to make the movement possible. Increasing the resistance is difficult at first, but is rewarded upon your return to your less steep project.
Find the Crux
For many projects, linking the entire route is the crux. If you are able to set the entire boulder on your training board, then simply work it until it goes. Frequently, this is an impossibility for one of two reasons: the wall is too short or the angle of the project changes in a way that the board cannot replicate. In either of these cases, it is best to build a boulder that replicates the most challenging moves.
To accommodate your wall size, this might mean making a series of one-move boulder problems. That is okay. The goal is to become more proficient for the project. If you want to make it more like a boulder problem, add non-project-specific moves to the climb to make your one-move replica into a workable boulder problem.
As you can see, replica building, especially in a gym, takes creativity. As far as the build itself is concerned, begin by finding the crux. Why you are falling on your outdoor project? Is the crux-hold too far away? Is it too small for you to hold? Is the move too heavy? Is it challenging to keep the feet on? Finding your crux is the first step to understanding projecting.
Pick Your Holds
Picking your holds is also important. For clarity, we are going to presume that you have access to some form of training wall. Looking at your wall, see if you can find a few holds that replicate the grips that you use on your boulder. Sometimes these grips do not look like your project’s actual holds, but will instead take some smaller part of a larger hold. Other times, these grips are turned the wrong way.
Now that you have found these grips, see if you can make any compromises. The focal point of your replica should be the crux holds while the holds leading to and away from this crux should simulate the movement. As such, it is less important that the non-crux holds replicate your project’s grips.
If the moves on your project are too hard for you to complete, try setting an easier version with more-positive holds. Trading a few crimps for jugs may feel counterproductive, but learning the movement is essential. As your body works the moves on more positive holds, reducing the grip size to the previously unattainable will feel more manageable.
If your gym does not have a training board, try and do what you can with the boulders set in the gym. This can be frustrating, but well worth your effort nonetheless. If this is impossible, perhaps it is worth spending more time on boulders that are similar to your project. While climbing can be specific, it is often described by left-right hand moves on an angle. Sometimes there are heel hooks and sometimes you have to keep your feet low. Whichever your project requires, find an a similarly-angled gym wall and try to represent that same level of core tension or balance.
Routesetting
With all of that said, if you have your own wall, the more specific the boulder, the better your result. Even if you climb on your friend’s wall, ask them if you could move a few holds to best replicate the crux or cruxes of your project. The less guess work involved in the process, the more effective the boulder. Some climbers will literally measure the distance between the holds of their project for a better replica.
Footholds
At a certain point, you will become proficient at completing your replica and it will become time to make it more difficult. Making the foothold worse is one of the best ways to strengthen yourself for the movement. To that effect, foot holds on a kickboard are way easier to use than footholds on an angle. Keep this in mind when you are building your project.
Training
Training on the replica is the most important part of the process. This is made more enjoyable by regularly trying the outdoor version between training cycles. While this is not strictly necessary, it can be difficult to climb on the same moves every session. The outdoor project is the carrot, the replica is the stick.
With this in mind, try and make your boulder fun. Ideally your project is a fun climb. Your replica should also be fun. Increasing the difficulty of the moves creates new indoor projects and this can be a fun process. At a certain point, a plateau will come along and this will feel frustrating. When this occurs, consider what it means to progress.
Climbers are results driven and forget that a “failed attempt” might still represent improvement. If you get closer to the hold, or have a better grasp on it than in the previous attempt, this is progress. Rest and try and get the hold with even greater precision.
Furthermore, outdoor problems make for excellent indoor boulders. If you set a good replica, it will probably be a good boulder. If this is the case, ask your friend to try the problem with you. They may have a beta that you had not considered and that could transfer to your outdoor project.


