New Year’s Training: Hangboard Week 2
This routine is built around increasing your finger strength safely and quickly through volume. Today we add sets an one-arm hangs.
The hardest part of climbing progression is trying hard. Digging deep is undoubtedly made more difficult by the extra stresses of the pandemic and general inaccessibility of the perfect training environment. Being self-motivated is not something that comes easily to everyone, but is an excellent skill to practice especially within the context of hard bouldering.
Progression, in bouldering, is dependent upon the individual’s ability to sacrifice the more social side of a training session for the uncomfortable positions training puts us in. Fortunately, climbing training is pretty fun and, after this last week, you are almost certainly feeling a little stronger than you might have on session 1 of Week 1.
To that effect, congratulations! Week 1 of the cycle is complete and it genuinely does get easier from here. Every week from here on out will more or less reflect that first week in its format. Remember, the goal is to get as many high-quality sessions as we can. The goal is not to stew in frustration until the four weeks is up. To try hard, your body needs rest. Rest, eat, stretch, then consider pulling again. If at any point you feel like you could really use an extra rest day, take the extra rest day.
Conditioning is for conditioning. We are not conditioning. We are fingerboarding.
Week 2:
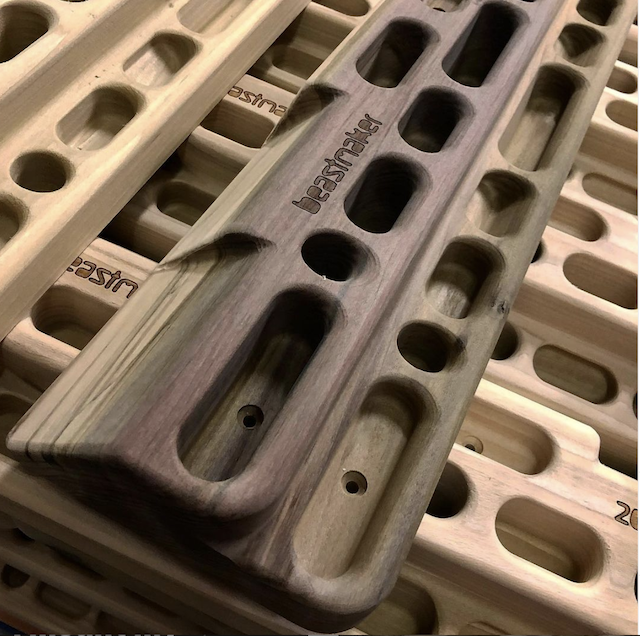
The Fingerboard:
After our last session, we will have taken 2 complete rest days. Rest days, for the climber locked at home are super difficult to deal with, but they are necessary and, as a reward, we get to try even harder the next session and get even stronger. Today, that is what we are going to do.
We are going to follow the same format as last week, in terms of the style of our hangs, but, we are going to add on three rounds of one arm hangs. One-arm hangs sound a lot more intense than they really are and are one of the greatest indicators of a climber’s ability on the rock. As such, Session 1 of Week 2 will go as follows:
4 sets of the openhand position
- 3 second hang: follow with 10 – 90 second rest
- 6 second hang: follow with 10 – 90 second rest
- 9 second hang: follow with 10 – 90 second rest
4 sets of the half-crimp position
- 3 second hang: follow with 10 – 90 second rest
- 6 second hang: follow with 10 – 90 second rest
- 9 second hang: follow with 10 – 90 second rest
4 sets of the three-finger open-hand position.
- 3 second hang: follow with 10 – 90 second rest
- 6 second hang: follow with 10 – 90 second rest
- 9 second hang: follow with 10 – 90 second rest
3 sets of one-arm hangs. For this exercise, pick an edge, or jug that you can hang off of for any amount of time, but preferably around 2-7 seconds. This will be your training edge until you are able to complete 3 sets of 7 second hangs separated by 3 minutes of rest per hang, on oth your right and left hands.
Form:
You should use a four-finger open handed grip with an engaged shoulder and the arm locked off at 120 degrees. Do not allow your arm to lock out strait. This puts strain on your connective tissues as opposed to your musculature.
Once you have achieved the above, you may move down to a smaller edge size. Do not feel rushed. This exercise targets the shoulder, bicep, and obviously the fingers. That means that there are at least three potential points of failure. It might take a few sessions before you are able to complete 3 sets of 7 seconds on both hands, even if you are using a jug.
If you are using a jug, and you still cannot hang from one arm for at least 2 seconds, skip this exercise. It is more important that you focus all of your shoulder stability on the two-arm dead hangs.
https://www.instagram.com/p/CJzRjyGjqHF/
Physical Exercise:
Front Lever:
- 6 sets of 10 seconds
This exercise is executed by assuming the lever position as best as you can. This means that you might sag underneath a perfect front lever. That is okay. The important part is spending the time to try and maintain the perfectly straight position at whichever angle you are able to replicate. Others might suggest holding one leg in and trying to hold the front lever position. This is not effective.
The issue with this method is that it trains the climber to become good at an exercise that is not the front lever. It will strengthen your shoulders and your lumbar, but it will provide significantly slower progression. The goal of this exercise is not to complete a front lever but to strengthen the muscles the front lever activates. Remember, we are training, not trying to find an easy way to hang from a bar. If you find yourself miles below a proper front lever, that is okay! It takes time to replicate a perfect lever.
Every time you attempt it, you are not failing. Instead, you are becoming stronger. The weaker at the lever you are, the greater the amount of strength you will earn, per day.
Push ups:
This is for the antagonist muscle training. It keeps your elbows safe.
- 100 elbows-back, military-style, push ups. Ideally 10 sets of 10, but if you cannot do this, then sets of 5 or even sets of 2 are perfectly okay. If you are completing sets of two, perhaps drop the number to 50 push ups instead of 100. This style of push up isolates the triceps.
Stretch:
It cannot be overstated how useful flexibility is. The more flexible you are, the less strength is required to move your feet up. To that effect, greater flexibility gives the climber a wider range of foothold options. As such there are a few areas that you should stretch specifically, and this is definitely a non-exhaustive list.
Hamstrings
- Hand to toe-hook matches
- Heel hooks
- Drop knees
Hip flexors
- High steps
- Drop knees
- Heel hooks
Middle splits
- Getting your hips into the wall.
- Middle splits are very useful. Flexible hip flexors are equally important.
You will retain the additional, non-finger-specific training on your other training days.
Schedule:
Day 1: Train
Day 2: Rest
Day 3: Train
Day 4: Rest
Day 5: Train
Day 6: Rest
Day 7: Rest
On days 3 and 5 this week you will move up from 4 sets per grip position to 5 sets per grip position.
5 sets of the openhand position
- 3 second hang: follow with 10 – 90 second rest
- 6 second hang: follow with 10 – 90 second rest
- 9 second hang: follow with 10 – 90 second rest
5 sets of the half-crimp position
- 3 second hang: follow with 10 – 90 second rest
- 6 second hang: follow with 10 – 90 second rest
- 9 second hang: follow with 10 – 90 second rest
5 sets of the three-finger open-hand position
- 3 second hang: follow with 10 – 90 second rest
- 6 second hang: follow with 10 – 90 second rest
- 9 second hang: follow with 10 – 90 second rest
3 sets of one-arm hangs
- Right hand: Aim for 7 seconds with 3 min rest
- Left hand: Aim for 7 seconds with 3 min rest
Check out the latest buyer's guide: