Tips For Climbing Rockies Alpine Ice Faces
Climbing big mountain routes is the ultimate experience. Having the best gear and knowing the right skills will increase your chances of having a successful day out
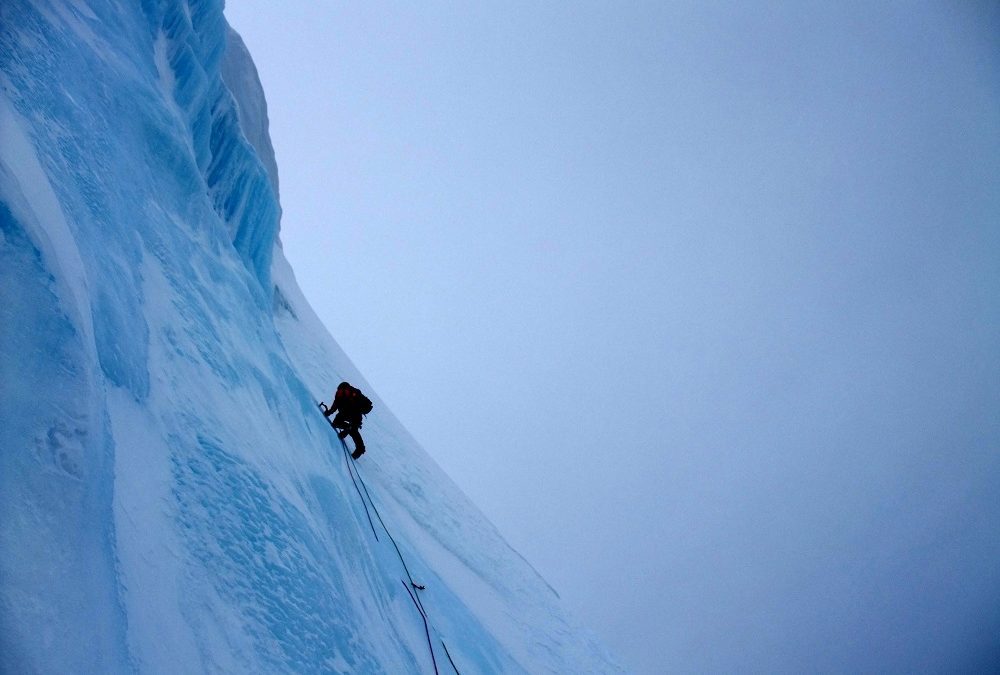 Photo by: Brandon Pullan
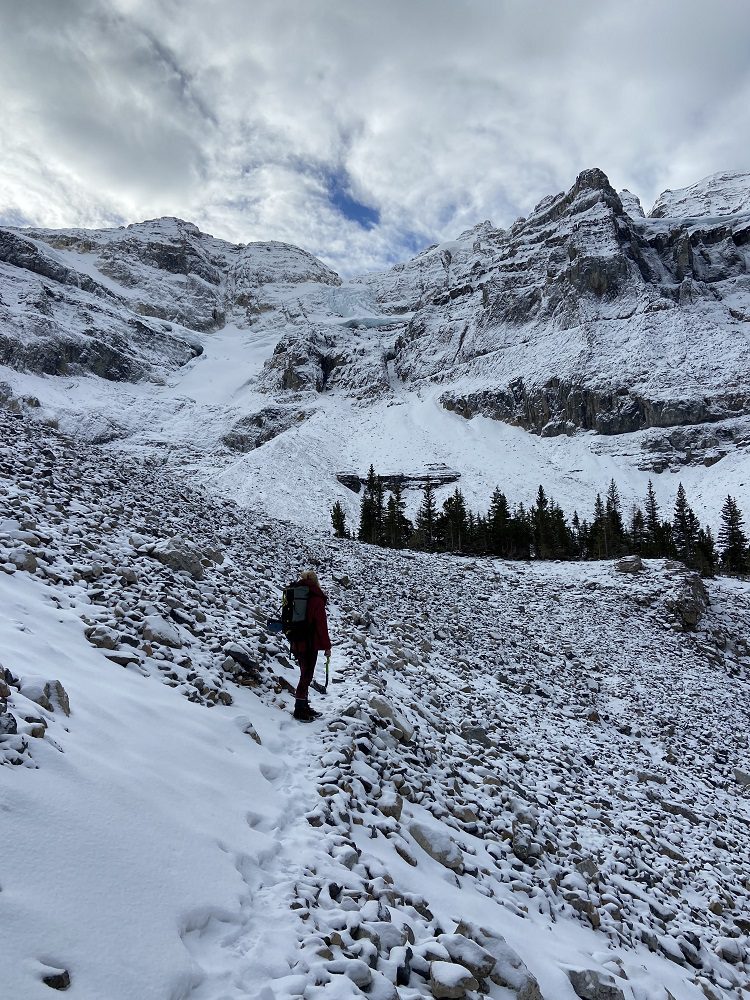
The Canadian Rockies have some of the most classic big ice faces in North America. Moving through big terrain far above the valley below as the sun rises is one of the best ways to experience the mountains. The climbs can lead to unforgettable experiences and can create lifelong partnerships. Alpine ice faces are complex and require patience and time to understand. Despite being formed of glacier ice, no two climbs are the same.
Understanding how to climb them safely will increase your odds of accomplishing your goals and getting home safely. The following are some helpful reminders and tips, but nothing replaces experience and proper training. Seek the mentorship of a veteran alpine climber or hire a guide to increase your knowledge of challenging mountain lines.
Tips for Alpine Faces
Mountain Model: The alpine environment changes every day, hour, and minute. Each mountain face reacts to direct sunlight and temperatures differently depending on its aspect. If it’s cold overnight, then the snow will be hard and easy to walk on in the morning. As the day warms then rockfalls and avalanches will increase, same goes for snow and wind. A climb on a southwest face might be safe at 6 a.m., but by 2 p.m., it will be very unsafe due to rock, ice and snow falling. Knowing the temperatures, the night before you climb, how much cloud cover there will be and when the face comes into sunlight is all vital information. Understanding the weather, aspect of your climb and descend, and conditions all help build your mountain model. Always be adjusting your mountain model when to make the decisions that will keep you safe.
Timing: They call it an alpine start for a reason. Alpine climbing is all about leaving early for the climb, which can lead to failing early to avoid any harsh conditions. It’s safer to be off the mountain if things don’t feel right than high on a face when the lightning storm starts. Have a plan and stick to it. If you’re falling behind or moving slow, then bail. You want to start and be off the face, generally, before the sun hits it.
Boot Selection: The conditions and route will determine your boot selection. While lightweight approach hybrid style boots are good for some alpine climbs, ice faces such as the North Face of Athabasca require a stiffer option that can handle a lever/bail crampon. You don’t want the heaviest duty boot, instead a lighter option that breathes well. In the Canadian Rockies, it’s best to wear light technical ice climbing boots that have a front and rear welt for lever/bail crampons.
Crampon Selection: Crampons are constructed with either aluminum or steel, have vertical or horizontal front points, are the front point mono or dual, and are they strap-on or lever/bail. Aluminum crampons that strap onto approach shoes are ideal for approaches over low-angled snow fields or for alpine routes with steep snow descents. For long ice faces, like the North Face of Stanley, the best option is steel. Aluminum doesn’t perform well on hard ice. Horizontal front points are good for snow climbing and glaciers, but steep ice faces are best climbed with vertical front points and mixed climbing. Dual points are good for steep ice, but mono points are good for mixed climbing and delicate ice. Some crampon constructions allow snow to accumulate, but you want one that doesn’t. Some models have anti-ball plates meant to keep snow out.
Crampon Use: When walking in crampons, keep your feet a little wider than shoulder width apart. Walk as though you’ve been riding a horse. This will help you avoid tripping on your other leg. On gradual terrain, engage both rows of points on the snow or ice you’re walking on. When traversing angled slopes, like you would on the Aberdeen Glacier, don’t only use one side of the crampon like you would with a ski. This is dangerous with crampons because the spikes can shear out. Stamp down and roll your ankle to engage all the bottom spikes. This ankle rolling is called the French technique. Once the terrain steepens, then you have to front-point which can be very tiring on your calves, so be sure to drop your heels to minimize muscle fatigue and to avoid calf cramps.
Solid Feet: Alpine ice faces will require a lot of movement over many hours. You’re going to get tired and your legs and feet might start to ache. Alpine climbing is not as safe as multi-pitch rock climbing or waterfall ice climbing. Expect long runouts where falling would result in serious injury or death. Having solid feet will keep you on the climb. Kick or place each foot carefully and don’t move off it until you’re confident it’s solid.

The Ice Axe: The ice axe can be one of the most versatile tools in your kit. It can be used for ascending and descending. The steep mountain ice faces in the Canadian Rockies require two technical ice climbing tools. Lower-angled snow faces require one mountaineering ice axe, which can be used for walking and mellow slopes. Your ability, the slope angle, the firmness of the snow and the potential for a fall determine what different hand positions you’ll use and when.
Systems: Alpine terrain is complicated, even 100-year-old classics like the Kain Face present complex cruxes. Unlike the crag where the routes are clean, chalk marks the way and beefy chains let you rappel with ease, the alpine often feels untouched. You’ll be clipping rusty pitons, backing up old, fixed gear and using often-manky rappel anchors to get down. You need to know how to equalize a three- to five-point anchor made of marginal placements. You need to know when to extend protection and how to protect a second on a traverse. Alpine climbs require a lot of different systems and knowing how to apply each is essential. The approach to ice faces often includes glacier travel. Using a t-slot to protect crevasse crossings is as important as staying roped-up. Knowing how to simul-climb on low-angle terrain and pitch-out steep ice using ice screw anchors is key. If there’s rock above the glacier, treat it like any other rock climb and have bomber anchors.
Be Safe: Being keen is what got you to the base of an alpine route but being smart will up the chance you’ll climb another day. Weather, routes conditions and psych are three of the biggest factors that stop your climb before it starts. More than one top alpinist has approached for hours only to turn around and walk back to the car for one reason or another. Go with your gut feeling and listen to your partner.
Find the Right Partner: Climbing alpine ice routes is as much about partnership as it is about your sending skills. You need to climb with someone you trust, who has the same goal, who will share leads and who won’t complain when you run out of food. Like any healthy relationship, communication is the most important part. Don’t jump on a big route with a new partner, instead start small with a few days at the crag or a low-commitment snow route. Be sure of their ice climbing skills and crevasse travel know-how. Don’t be a guide to a partner, you both need to be on the same page.
Post-Climb Review: Alpine climbing is all about learning. After each climb, review what went right and what went wrong. If you screwed up then practice so you don’t again. Always be tweaking your systems with your partner to create the most efficient team possible.
Check out the latest buyer's guide: